Using the Web Modeling Editor
This guide explains how to use the BESSER Web Modeling Editor.
Accessing the Editor
You can access the BESSER Web Modeling Editor in two ways:
Public online version: Visit editor.besser-pearl.org in your web browser
Local deployment: Deploy the editor locally by following the instructions in Deploying Locally
Dashboard Structure
Note
The BESSER Web Modeling Editor is organized around projects. Projects allow you to group related diagrams together, manage multiple models within a single workspace, and maintain better organization of your work. A project can contain multiple diagrams of each type.
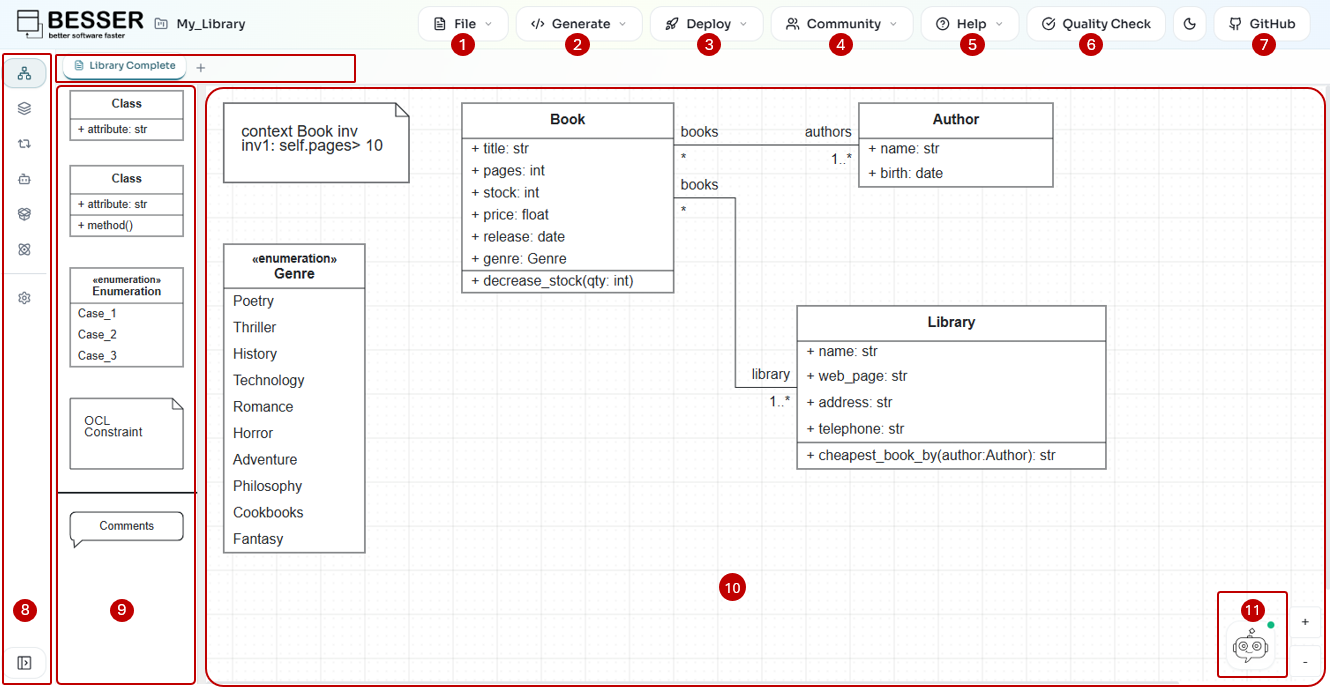
The numbered elements in the interface are described below.
6. Quality Check
Click the Quality Check button to validate your model. The editor checks for errors including duplicate class names, invalid OCL constraint syntax, and structural model consistency. Validation results are displayed with specific error messages.
7. GitHub and Utilities
The right side of the top bar provides quick-access utilities:
Theme toggle: Switch between light and dark mode.
Star: Star or unstar the BESSER GitHub repository (when signed in).
GitHub account: Sign in or out of your GitHub account. Once authenticated, the Deploy menu becomes available.
Sync: Synchronize your project with GitHub version control.
9. Palette
The palette contains the shapes and elements you can drag and drop onto the canvas. The available elements change depending on the active diagram type. For class diagrams, the palette includes:
Class (with attributes only)
Class (with attributes and methods)
Abstract Class
Interface
Enumeration
OCL Constraint
Other elements like Associations, Generalizations, and Association Classes are created by connecting elements directly on the canvas.
10. Canvas
The canvas is the main drawing area where you design your model. You can:
Drag elements from the palette onto the canvas.
Connect elements by clicking and dragging from connection points.
Double-click elements to edit their properties.
Pan and zoom to navigate large diagrams.
11. Agent Widget
The Agent Widget (bottom-right corner) provides an AI-powered assistant that can help you with modeling tasks. Click the bot icon to open the chat interface and ask questions about your model or get suggestions.